What you'll learn
- How to create a custom language generator.
- How to create block generator definitions for existing blocks.
- How to create block generator definitions for new blocks.
- How to use a custom generator in an application.
What you'll build
You will build a JSON generator that implements the JSON language spec.
What you'll need
- Familiarity with JSON and the JSON specification.
- Basic understanding of blocks and toolboxes in Blockly.
- NPM installed (instructions).
- Comfort using the command line/terminal.
This codelab will demonstrate how to add code to the Blockly sample app to create and use a new generator.
The application
Use the npx @blockly/create-package app command to create a standalone application that contains a sample setup of Blockly, including custom blocks and a display of the generated code and output.
- Run
npx @blockly/create-package app custom-generator-codelab. This will create a blockly application in the foldercustom-generator-codelab. cdinto the new directory:cd custom-generator-codelab.- Run
npm startto start the server and run the sample application. - The sample app will automatically run in the browser window that opens.
The initial application has one custom block and includes JavaScript generator definitions for that block. Since this codelab will be creating a JSON generator instead, it will remove that custom block and add its own.
The complete code used in this codelab can be viewed in blockly-samples under examples/custom-generator-codelab.
Before setting up the rest of the application, change the storage key used for this codelab application. This will ensure that the workspace is saved in its own storage, separate from the regular sample app, so that it doesn't interfere with other demos. In serialization.js, change the value of storageKey to some unique string. jsonGeneratorWorkspace will work:
// Use a unique storage key for this codelab
const storageKey = 'jsonGeneratorWorkspace';
Blocks
This codelab will use two custom blocks, as well as five blocks from Blockly's standard set.
The custom blocks represent the Object and Member sections of the JSON specification.
The blocks are:
objectmembermath_numbertextlogic_booleanlogic_nulllists_create_with
Custom block definitions
Create a new file in the src/blocks/ directory called json.js. This will hold the custom JSON-related blocks. Add the following code:
import * as Blockly from 'blockly';

export const blocks = Blockly.common.createBlockDefinitionsFromJsonArray([{
  "type": "object",
  "message0": "{ %1 %2 }",
  "args0": [
    {
      "type": "input_dummy"
    },
    {
      "type": "input_statement",
      "name": "MEMBERS"
    }
  ],
  "output": null,
  "colour": 230,
},
{
  "type": "member",
  "message0": "%1 %2 %3",
  "args0": [
    {
      "type": "field_input",
      "name": "MEMBER_NAME",
      "text": ""
    },
    {
      "type": "field_label",
      "name": "COLON",
      "text": ":"
    },
    {
      "type": "input_value",
      "name": "MEMBER_VALUE"
    }
  ],
  "previousStatement": null,
  "nextStatement": null,
  "colour": 230,
}]);
This code creates the block definitions, but it doesn't register the definitions with Blockly to make the blocks usable. We'll do that in src/index.js. Currently, the app imports blocks from the original sample file, text.js. Instead, it should import the definitions that were just added. Remove the original import:
// Remove this!
import {blocks} from './blocks/text';
and add the import for the new blocks:
import {blocks} from './blocks/json';
Later in the file the block definitions are registered with Blockly (this code is already present and does not need to be added):
Blockly.common.defineBlocks(blocks);
Toolbox definition
Next, define a toolbox that includes these custom blocks. For this example, there's a flyout-only toolbox with seven blocks in it.
The file src/toolbox.js contains the original sample toolbox. Replace the entire contents of that file with this code:
export const toolbox = {
  'kind': 'flyoutToolbox',
  'contents': [
    {
      'kind': 'block',
      'type': 'object'
    },
    {
      'kind': 'block',
      'type': 'member'
    },
    {
      'kind': 'block',
      'type': 'math_number'
    },
    {
      'kind': 'block',
      'type': 'text'
    },
    {
      'kind': 'block',
      'type': 'logic_boolean'
    },
    {
      'kind': 'block',
      'type': 'logic_null'
    },
    {
      'kind': 'block',
      'type': 'lists_create_with'
    },
  ]
}
Our index.js file already handles importing the toolbox and using it in Blockly.
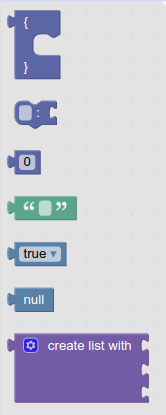
If the server is already running, refresh the page to see changes. Otherwise, run npm start to start the server. New blocks should now exist in the toolbox, like this:
The app is still trying to generate and run JavaScript for the workspace, instead of JSON. We will change that soon.
A language generator defines the basic properties of a language, such as how indentation works. Block generators define how individual blocks are turned into code, and must be defined for every block used.
A language generator has a single entry point: workspaceToCode. This function takes in a workspace and:
- Initializes the generator and any necessary state by calling
init. - Walks the list of top blocks on the workspace and calls
blockToCodeon each top block. - Cleans up any leftover state by calling
finish. - Returns the generated code.
Create the language generator
The first step is to define and call the custom language generator.
A custom language generator is simply an instance of Blockly.Generator. Create a new file src/generators/json.js. In it, import Blockly and call the Blockly.Generator constructor, passing in the generator's name and storing the result.
import * as Blockly from 'blockly';

export const jsonGenerator = new Blockly.CodeGenerator('JSON');
Generate code
Next, hook up the new generator with the sample app. First, remove the old code that imports the new block generator properties and assigns them to the javascriptGenerator. Remove these lines from src/index.js:
// Remove these lines!
import {forBlock} from './generators/javascript';
import {javascriptGenerator} from 'blockly/javascript';

// Also remove this line! (further down)
Object.assign(javascriptGenerator.forBlock, forBlock);
Now import the new generator:
import {jsonGenerator} from './generators/json';
Currently, there are two panels in the app next to the workspace. One shows the generated JavaScript code, and one executes it. The one panel showing the generated Javascript code will be changed to show the generated JSON code instead. Since JSON can't be directly executed, the panel that shows the execution will be left blank. Change the runCode function to the following:
// This function resets the code div and shows the
// generated code from the workspace.
const runCode = () => {
  const code = jsonGenerator.workspaceToCode(ws);
  codeDiv.innerText = code;
};
Since the bottom panel is not being modified, delete this line:
// Remove this line!
const outputDiv = document.getElementById('output');
The generated code will now be shown automatically in the top left panel. Refresh the sample app page to see the changes so far.
Test it
Put a number block on the workspace and check the generator output area. It's empty, so check the console. You should see an error:
Language "JSON" does not know how to generate code for block type "math_number".
This error occurs because there has to be a block generator for each type of block. Read the next section for more details.
At its core, a block generator is a function that takes in a block (and optionally the language generator instance), translates the block into code, and returns that code as a string.
Each language generator has a property called forBlock, which is a dictionary object where all block generator functions must be placed. For instance, here is the code to add a block generator for blocks of type sample_block on a language generator object (sampleGenerator).
sampleGenerator.forBlock['sample_block'] = function(block, generator) {
  return 'my code string';
};
Statement blocks
Statement blocks represent code that does not return a value.
A statement block's generator simply returns a string.
For example, this code defines a block generator that always returns the same function call.
sampleGenerator.forBlock['left_turn_block'] = function(block, generator) {
  return 'turnLeft()';
};
Value blocks
Value blocks represent code that returns a value.
A value block's generator returns an array containing a string and a precedence value. The built-in generators have predefined operator precedence values exported as an Order enum.
This code defines a block generator that always returns 1 + 1:
sampleGenerator.forBlock['two_block'] = function(block, generator) {
  return ['1 + 1', Order.ADDITION];
};
Operator precedence
Operator precedence rules determine how the correct order of operations is maintained during parsing. In Blockly's generators, operator precedence determines when to add parentheses.
–> Read more about operator precedence in JavaScript.
–> Read more about operator precedence in Blockly.
Since JSON does not allow values that are expressions, the code does not need to consider operator precedence for the generator being built in this codelab. The same value can be used everywhere a precedence value is required. Since parentheses never need to be added to the JSON, call this value ATOMIC.
In src/generators/json.js, declare a new enum called Order and add the ATOMIC value:
const Order = {
  ATOMIC: 0,
};
This step will build the generators for the simple value blocks: logic_null, text, math_number, and logic_boolean.
It will use getFieldValue on several types of fields.
Null
The simplest block in this example is the logic_null block.

No matter what, it generates the code 'null'. Notice that this is a string, because all generated code is a string. Add the following code to src/generators/json.js:
jsonGenerator.forBlock['logic_null'] = function(block) {
  return ['null', Order.ATOMIC];
};
String
Next is the text block.

Unlike logic_null, there is a single text input field on this block. Use getFieldValue:
const textValue = block.getFieldValue('TEXT');
Since this is a string in the generated code, wrap the value in quotation marks and return it:
jsonGenerator.forBlock['text'] = function(block) {
  const textValue = block.getFieldValue('TEXT');
  const code = `"${textValue}"`;
  return [code, Order.ATOMIC];
};
Number
The math_number block has a number field.

Like the text block, the math_number block can use getFieldValue. Unlike the text block, the function doesn't need to wrap it in additional quotation marks, because in the JSON code, it won't be a string.
However, like all generated code and as with null above, the function needs to return the code as a string from the generator.
jsonGenerator.forBlock['math_number'] = function(block) {
  const code = String(block.getFieldValue('NUM'));
  return [code, Order.ATOMIC];
};
Boolean
The logic_boolean block has a dropdown field named BOOL.

Calling getFieldValue on a dropdown field returns the value of the selected option, which may not be the same as the display text. In this case the dropdown has two possible values: TRUE and FALSE.
jsonGenerator.forBlock['logic_boolean'] = function(block) {
  const code = (block.getFieldValue('BOOL') === 'TRUE') ? 'true' : 'false';
  return [code, Order.ATOMIC];
};
Summary
- Value blocks return an array containing the value as a string and the precedence.
getFieldValuefinds the field with the specified name and returns its value.- The type of the return value from
getFieldValuedepends on the type of the field.- Each field type must document what its value represents.
This step will build the generator for the member block. It will use the function getFieldValue, and introduce the function valueToCode.
The member block has a text input field and a value input.

The generated code looks like "property name": "property value".
Field value
The property name is the value of the text input, which is fetched via getFieldValue:
const name = block.getFieldValue('MEMBER_NAME');
Recall: the name of the value being fetched is MEMBER_NAME because that is how it was defined in src/blocks/json.js.
Input value
The property value is whatever is attached to the value input. A variety of blocks could be attached there: logic_null, text, math_number, logic_boolean, or even an array (lists_create_with). Use valueToCode to get the correct value:
const value = generator.valueToCode(block, 'MEMBER_VALUE',
    Order.ATOMIC);
valueToCode does three things:
- Finds the blocks connected to the named value input (the second argument)
- Generates the code for that block
- Returns the code as a string
If no block is attached, valueToCode returns null. In another generator, valueToCode might need to replace null with a different default value; in JSON, null is fine.
The third argument is related to operator precedence. It is used to determine if parentheses need to be added around the value. In JSON, parentheses will never be added, as discussed in an earlier section.
Build the code string
Next, assemble the arguments name and value into the correct code, of the form "name": value.
const code = `"${name}": ${value}`;
Put it all together
All together, here is block generator for the member block:
jsonGenerator.forBlock['member'] = function(block, generator) {
  const name = block.getFieldValue('MEMBER_NAME');
  const value = generator.valueToCode(
      block, 'MEMBER_VALUE', Order.ATOMIC);
  const code = `"${name}": ${value}`;
  return code;
};
This step will build the generator for the array block. You will learn how to indent code and handle a variable number of inputs.
The array block uses a mutator to dynamically change the number of inputs it has.
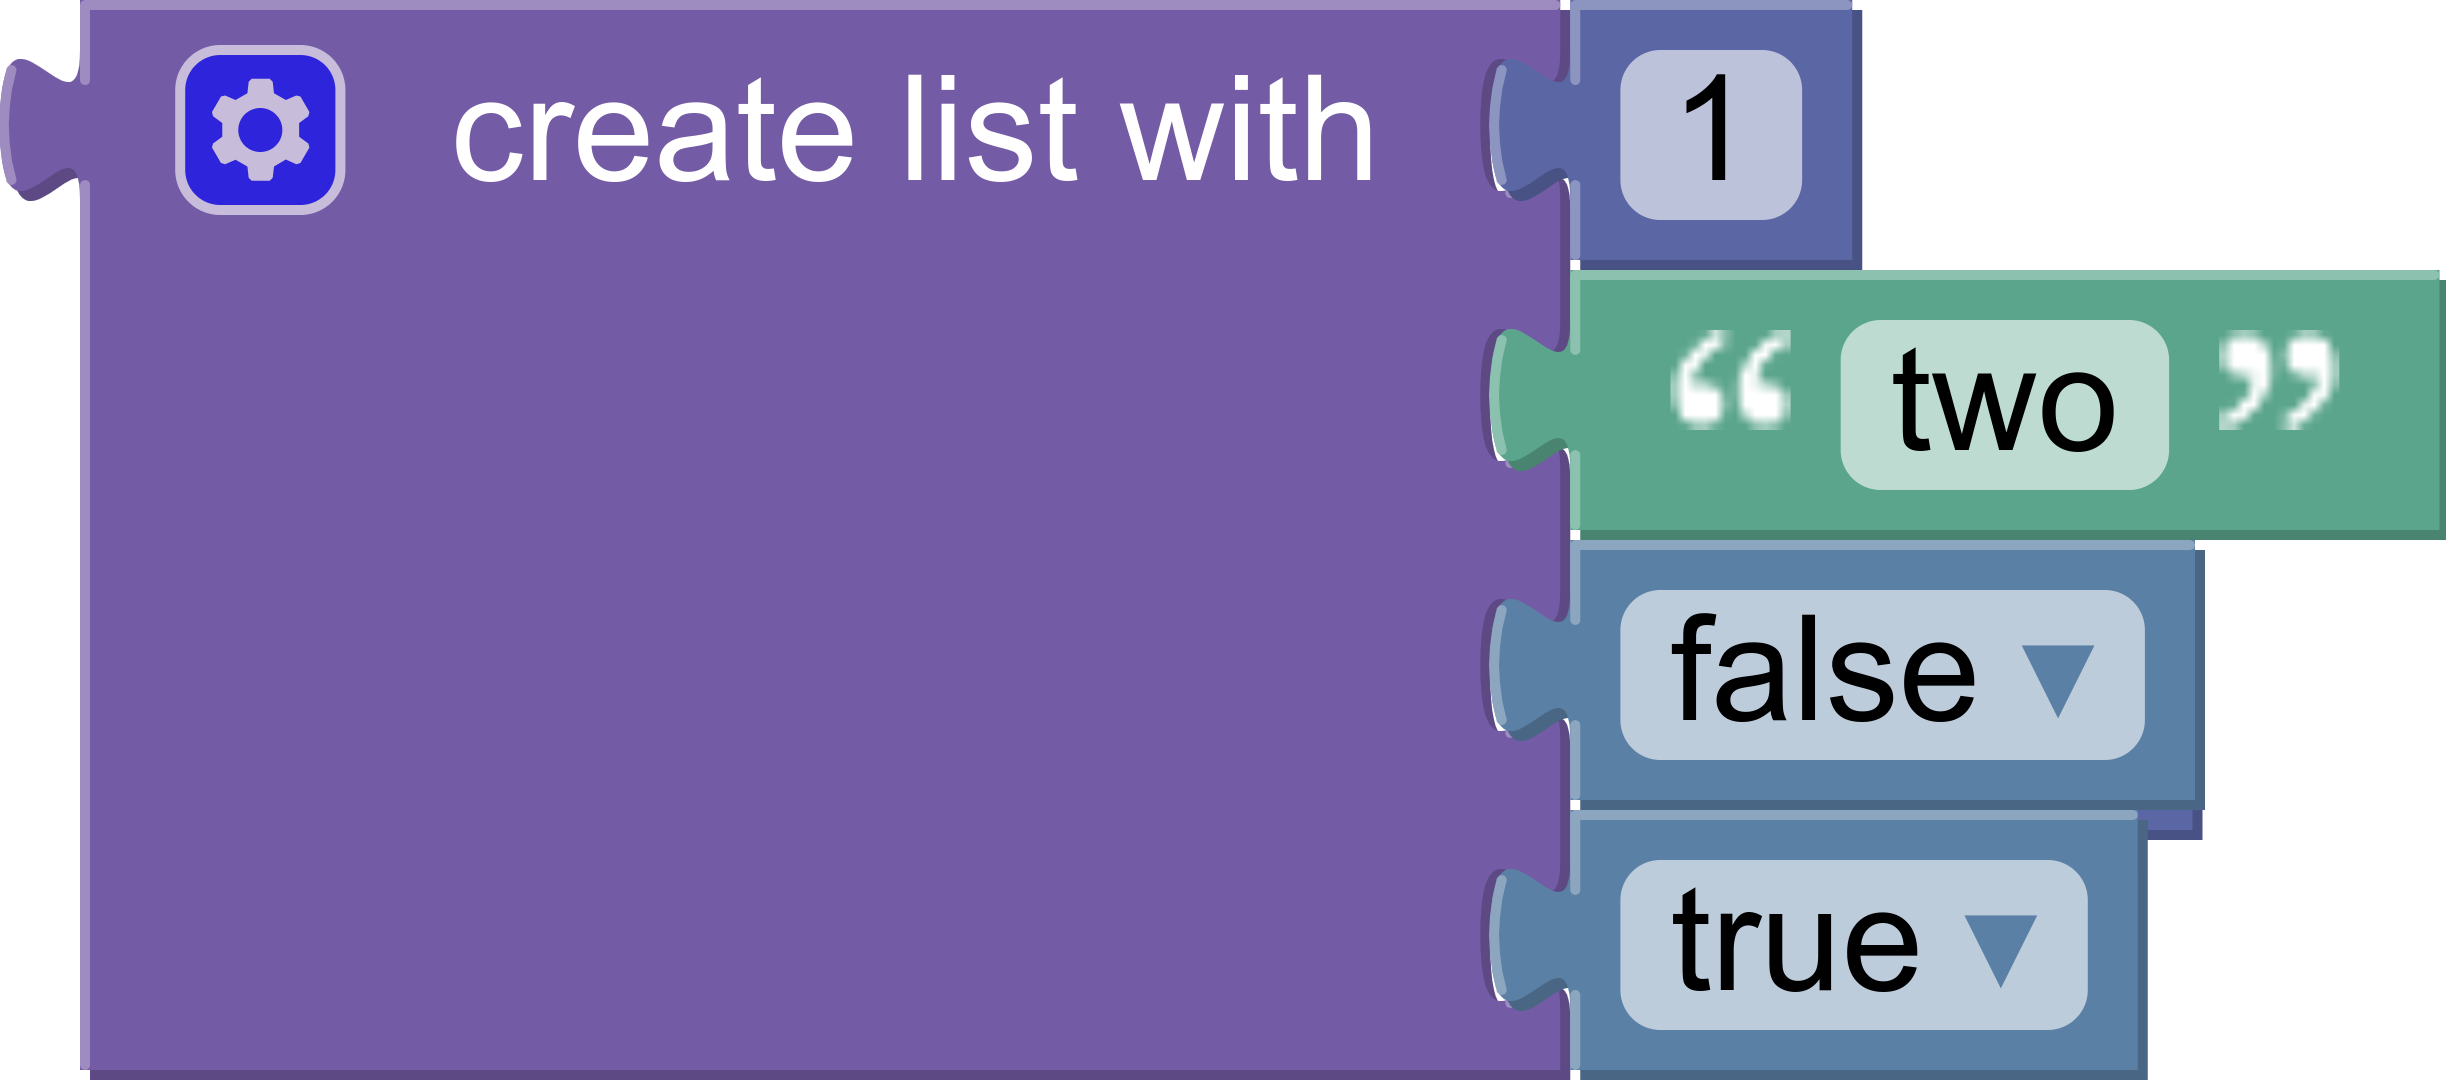
The generated code looks like:
[
  1,
  "two",
  false,
  true
]
As with member blocks, there are no restrictions on the types of blocks connected to inputs.
Gather values
Each value input on the block has a name: ADD0, ADD1, etc. Use valueToCode in a loop to build an array of values:
const values = [];
for (let i = 0; i < block.itemCount_; i++) {
  const valueCode = generator.valueToCode(block, 'ADD' + i,
      Order.ATOMIC);
  if (valueCode) {
    values.push(valueCode);
  }
}
Notice that the code skips empty inputs by checking if valueCode is null.
To include empty inputs, use the string 'null' as the value:
const values = [];
for (let i = 0; i < block.itemCount_; i++) {
  const valueCode =  generator.valueToCode(block, 'ADD' + i,
      Order.ATOMIC) || 'null';
  values.push(valueCode);
}
Format
At this point values is an array of strings. The strings contain the generated code for each input.
Convert the list into a single string, with a comma and newline separating each element:
const valueString = values.join(',\n');
Next, use prefixLines to add indentation at the beginning of each line:
const indentedValueString =
    generator.prefixLines(valueString, generator.INDENT);
INDENT is a property on the generator. It defaults to two spaces, but language generators may override it to increase indent or change to tabs.
Finally, wrap the indented values in brackets and return the string:
const codeString = '[\n' + indentedValueString + '\n]';
return [codeString, Order.ATOMIC];
Putting it all together
Here is the final array block generator:
jsonGenerator.forBlock['lists_create_with'] = function(block, generator) {
  const values = [];
  for (let i = 0; i < block.itemCount_; i++) {
    const valueCode = generator.valueToCode(block, 'ADD' + i,
        Order.ATOMIC);
    if (valueCode) {
      values.push(valueCode);
    }
  }
  const valueString = values.join(',\n');
  const indentedValueString =
      generator.prefixLines(valueString, generator.INDENT);
  const codeString = '[\n' + indentedValueString + '\n]';
  return [codeString, Order.ATOMIC];
};
Test it
Test the block generator by adding an array to the onscreen blocks and populating it.
What code does it generate if there are no inputs?
What if there are five inputs, one of which is empty?
This section will write the generator for the object block and will demonstrate how to use statementToCode.
The object block generates code for a JSON Object. It has a single statement input, in which member blocks may be stacked.
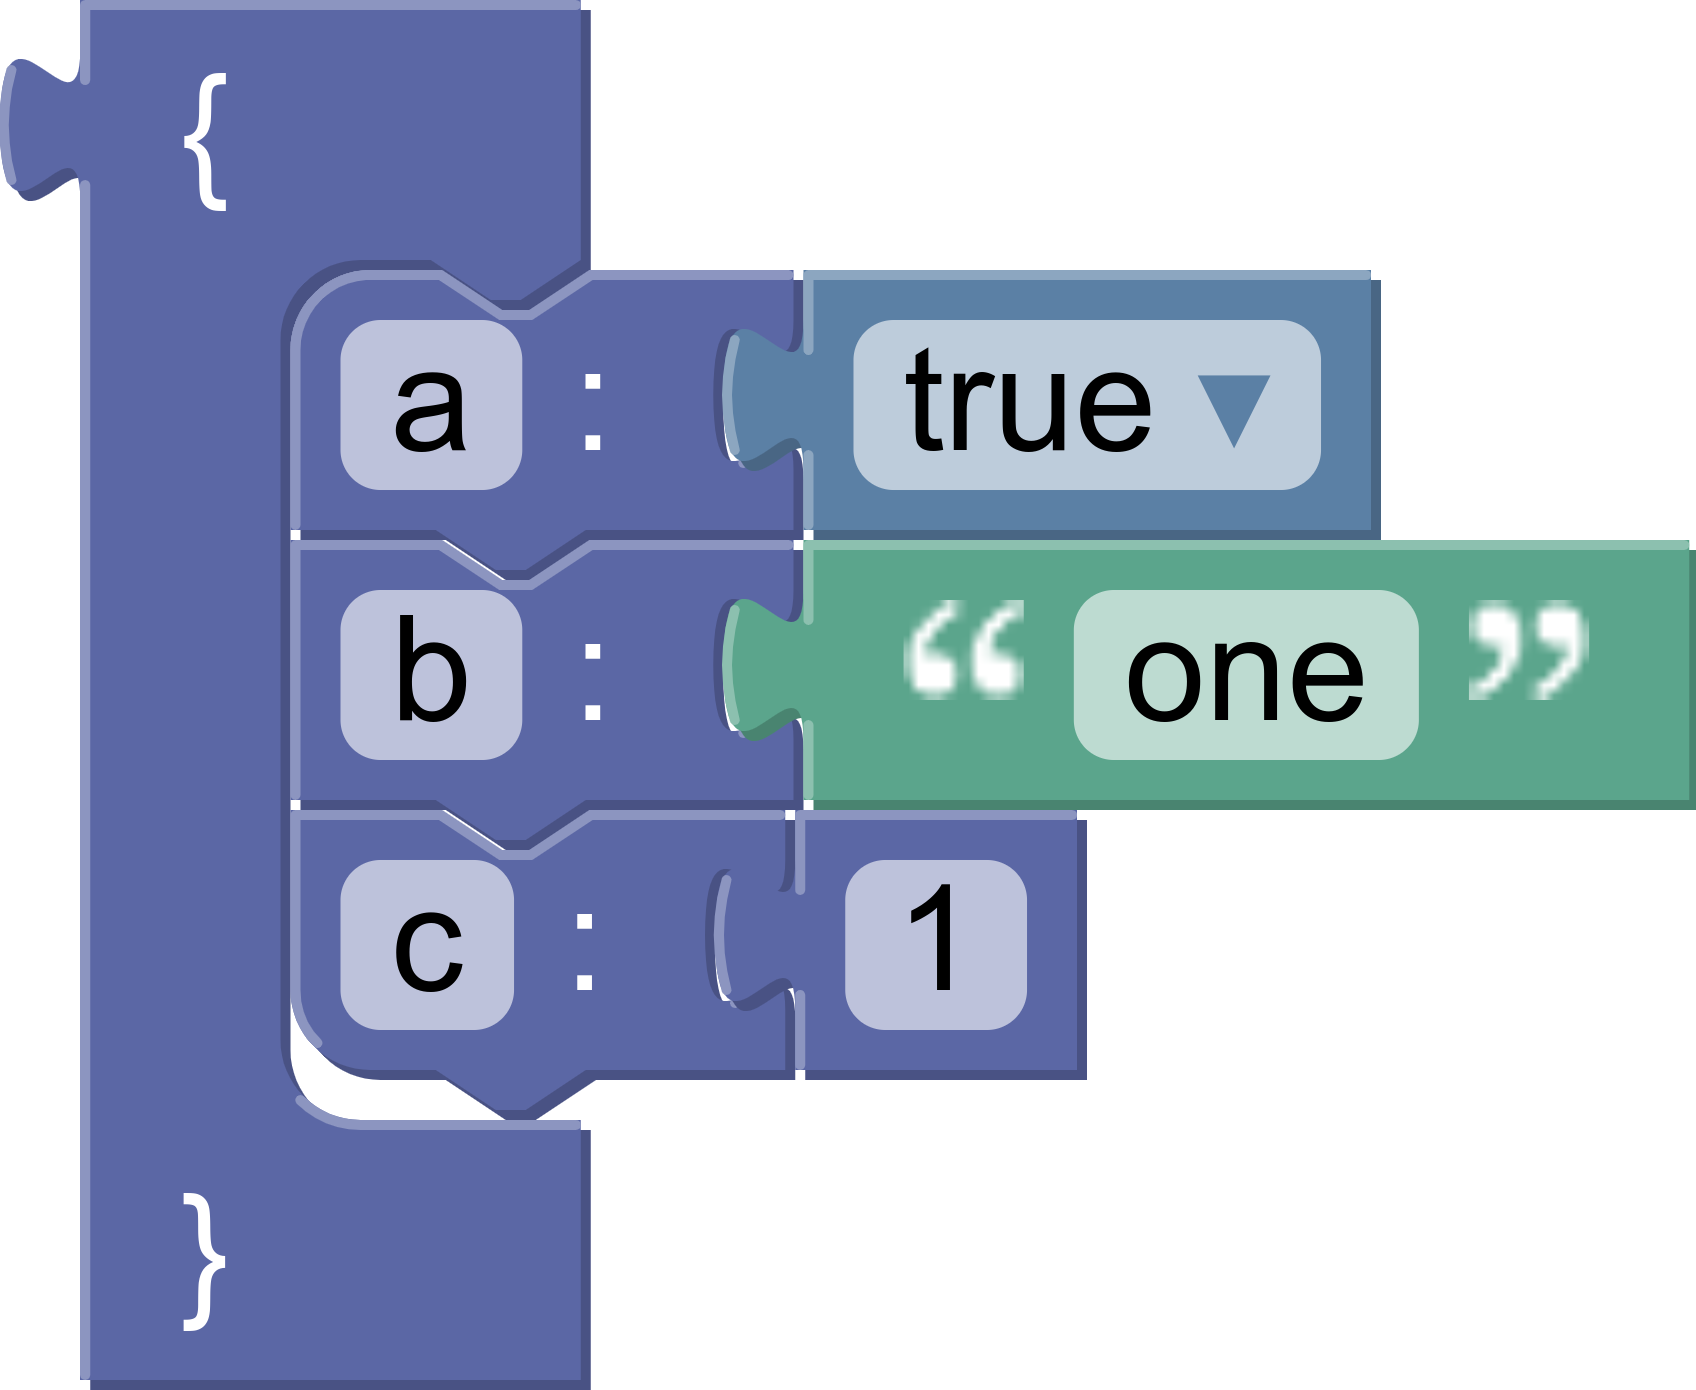
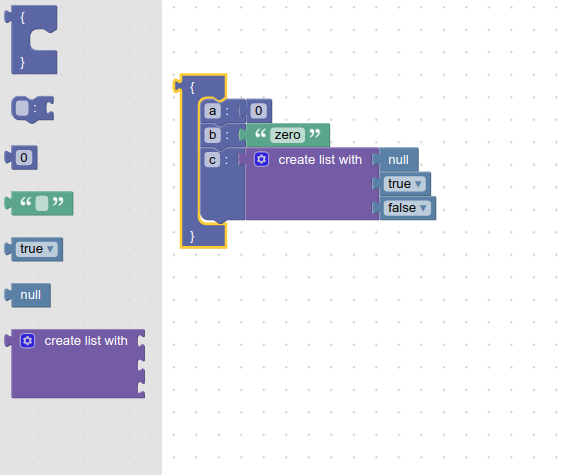
The generated code looks like this:
{
  "a": true,
  "b": "one",
  "c": 1
}
Get the contents
We'll use statementToCode to get the code for the blocks attached to the statement input of the object block.
statementToCode does three things:
- Finds the first block connected to the named statement input (the second argument)
- Generates the code for that block
- Returns the code as a string
In this case the input name is 'MEMBERS'.
const statement_members =
    generator.statementToCode(block, 'MEMBERS');
Format and return
Wrap the statements in curly brackets and return the code, using the default precedence:
const code = '{\n' + statement_members + '\n}';
return [code, Order.ATOMIC];
Note that statementToCode handles the indentation automatically.
Test it
Here is the full block generator:
jsonGenerator.forBlock['object'] = function(block, generator) {
  const statementMembers =
      generator.statementToCode(block, 'MEMBERS');
  const code = '{\n' + statementMembers + '\n}';
  return [code, Order.ATOMIC];
};
Test it by generating code for an object block containing a single member block. The result should look like this:
{
  "test": true
}
Next, add a second member block and rerun the generator. Did the resulting code change? Let's look at the next section to find out why not.
The scrub_ function
The scrub_ function is called on every block from blockToCode. It takes in three arguments:
blockis the current block.codeis the code generated for this block, which includes code from all attached value blocks.opt_thisOnlyis an optionalboolean. If true, code should be generated for this block but no subsequent blocks.
By default, scrub_ simply returns the passed-in code. A common pattern is to override the function to also generate code for any blocks that follow the current block in a stack. In this case, the code will add commas and newlines between object members:
jsonGenerator.scrub_ = function(block, code, thisOnly) {
  const nextBlock =
      block.nextConnection && block.nextConnection.targetBlock();
  if (nextBlock && !thisOnly) {
    return code + ',\n' + jsonGenerator.blockToCode(nextBlock);
  }
  return code;
};
Testing scrub_
Create a stack of member blocks on the workspace. There should be generated code for all of the blocks, not just the first one.
Next, add an object block and drag the member blocks into it. This case tests statementToCode, and should generate code for all of of the blocks.
In this codelab you learned:
- How to build a custom language generator to generate JSON.
- How to define block generators for built in blocks and for custom blocks.
- How to use a custom generator in a sample app.
- How to use the core generator functions:
statementToCode,valueToCode,blockToCode, andgetFieldValue. - How to generate code for stacks of blocks.
JSON is a simple language, and there are many additional features that could be implemented in a custom generator. Blockly's built-in language generators are a good place to learn more about some additional features:
- Variable definition and use.
- Function definition and use.
- Initialization and cleanup.
- Injecting additional functions and variables.
- Handling comments.
- Handling parentheses with operator precedence.
Blockly ships with five language generators: Python, Dart, JavaScript, PHP, and Lua. The language generators and block generators can be found in the generators directory.